Flashing Messages using the flash() Function in Flask

I am a self-taught Python developer who loves to write on Python Programming and quite obsessed with Machine Learning.
Introduction
The Flask flash() function is an efficient way to display temporary messages to the user. This can be used to display a variety of messages, including error, notification, warning, and status messages.
By the end of this article, you'll be able to learn:
How to use the
flash()functionFlashing messages on the frontend
Flashing messages with categories
Filtering flash messages based on categories
Best practices for effectively using flashed messages
Prerequisites
Before you dive into this tutorial on flashing messages with Flask, make sure you have a fundamental understanding of the following concepts:
Familiarity with Flask, including route handling, templates, and basic application structure.
A basic understanding of HTML markup is necessary, as you'll be working with HTML templates to render the flashed messages on the frontend.
Understanding of Jinja2 templating engine, which is integrated with Flask for rendering dynamic content within HTML templates.
How to Use flash() Method
As previously mentioned, the flash() function is used to display messages to the users after the specific request is made. Its primary goal is to offer relevant feedback, which enhances the user experience.
The flash() function accepts two parameters:
message: The message to display to the user.category: Specifies the message category. This is an optional parameter.
Using flash() within Flask App
This section describes how to integrate the message flashing functionality into the Flask application and display it on the frontend.
Importing flash from flask and other required modules
Create an app.py file and import the flash from flask, along with other necessary modules, into the file.
from flask import Flask, render_template, request, url_for, redirect
from flask import flash
You could also import these modules in a single line as well.
Flask App Setup
app = Flask(__name__)
app.secret_key = "Sachin"
An instance of Flask is created and stored within the app variable to initialize the Flask application.
The Flask application's secret key is assigned as "Sachin" using the secret_key attribute of the app object. This key will serve for session management.
Note: It's essential to store the secret key in a secure environment, rather than hardcoding it directly within the application.
Implementing flash() Function within View Functions
@app.route("/info", methods=["GET", "POST"])
def add_info():
    if request.method == "POST":
        name = request.form['name']
        profession = request.form['profession']

        if name == "" or profession == "":
            flash("Invalid: Every field is required.")
            return redirect(url_for("add_info"))
        else:
            flash("Success: Info added successfully.")
            return redirect(url_for("add_info"))
    return render_template("info.html")
The route "/info" is created to manage both GET and POST requests, and it is linked to the add_info() view function.
Within the add_info() view function, it checks whether the request is a POST request, and then retrieves the values from the "Name" and "Profession" form fields.
Following that, it examines if any of the fields are empty. If they are, a message "Invalid: Every field is required." is displayed using the flash() function, and the route remains the same. Conversely, if none of the fields are empty, a message "Success: Info added successfully." is flashed using the flash() function, and the route continues for further information input.
However, this won't immediately display the message on the frontend. To achieve that, you must use the get_flashed_messages() function within the template.
Implementing get_flashed_messages() Function within Message Template
Create a file named message.html within the templates directory in your project.
{% with msg = get_flashed_messages() %}
{% if msg %}
{% for message in msg %}
<div class="alert alert-warning alert-dismissible fade show" role="alert">
  <strong>{{ message }}</strong>
  <button type="button" class="btn-close" data-bs-dismiss="alert" aria-label="Close"></button>
</div>
{% endfor %}
{% endif %}
{% endwith %}
The get_flashed_messages() function retrieves the flashed messages and preserves them in the session. The function is invoked using the with statement and its output is stored in the msg variable.
The {% if msg %} statement evaluates whether any flashed messages are stored in the msg variable. If such messages exist, the {% for message in msg %} block iterates through each message and renders them using {{ message }} within the Bootstrap alert component.
Ultimately, the loop terminated using {% endfor %}, the conditional block is terminated using {% endif %}, and the with statement block is terminated with {% endwith %}.
Now you can include the message template in any of your templates to display the messages.
Preparing the Frontend
Create two HTML files in the templates folder with the names base.html and info.html.
base.html
This file will contain the basic HTML layout with Bootstrap CSS and JavaScript.
<!doctype html>
<html lang="en">
<head>
    <meta charset="utf-8">
    <meta content="width=device-width, initial-scale=1" name="viewport">

    <link crossorigin="anonymous" href="https://cdn.jsdelivr.net/npm/bootstrap@5.1.3/dist/css/bootstrap.min.css"
          integrity="sha384-1BmE4kWBq78iYhFldvKuhfTAU6auU8tT94WrHftjDbrCEXSU1oBoqyl2QvZ6jIW3" rel="stylesheet">

    <title>Flash Message Using Flask</title>
</head>
<body>

{% block content %} {% endblock %}

<script crossorigin="anonymous"
        integrity="sha384-ka7Sk0Gln4gmtz2MlQnikT1wXgYsOg+OMhuP+IlRH9sENBO0LRn5q+8nbTov4+1p"
        src="https://cdn.jsdelivr.net/npm/bootstrap@5.1.3/dist/js/bootstrap.bundle.min.js"></script>
</body>
</html>
info.html
This file will hold a form for inputting information and includes the message.html template to display flashed messages.
{% extends 'base.html' %}

{% block content %}
{% include 'message.html' %}
<div class="container my-5">
    <form action="/info" method="post">
        <div class="mb-3">
            <label class="form-label" for="name">Name</label>
            <input class="form-control" id="name" name="name" type="text">
        </div>
        <div class="mb-3">
            <label class="form-label" for="profession">Profession</label>
            <input class="form-control" id="profession" name="profession" type="text">
        </div>
        <button class="btn btn-dark" type="submit">Submit</button>
    </form>
</div>
{% endblock %}
Running the Flask Application
When you execute the app.py file and evaluate the frontend, you'll observe flashed messages upon making requests.
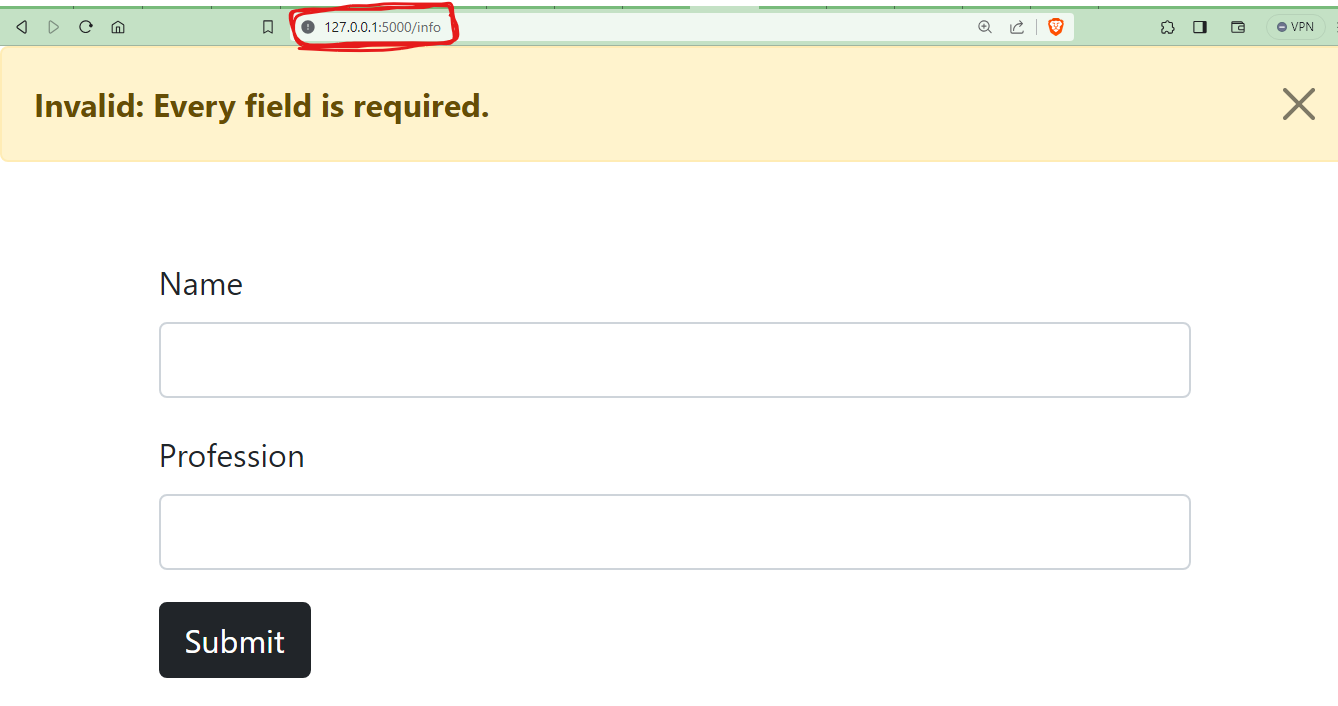
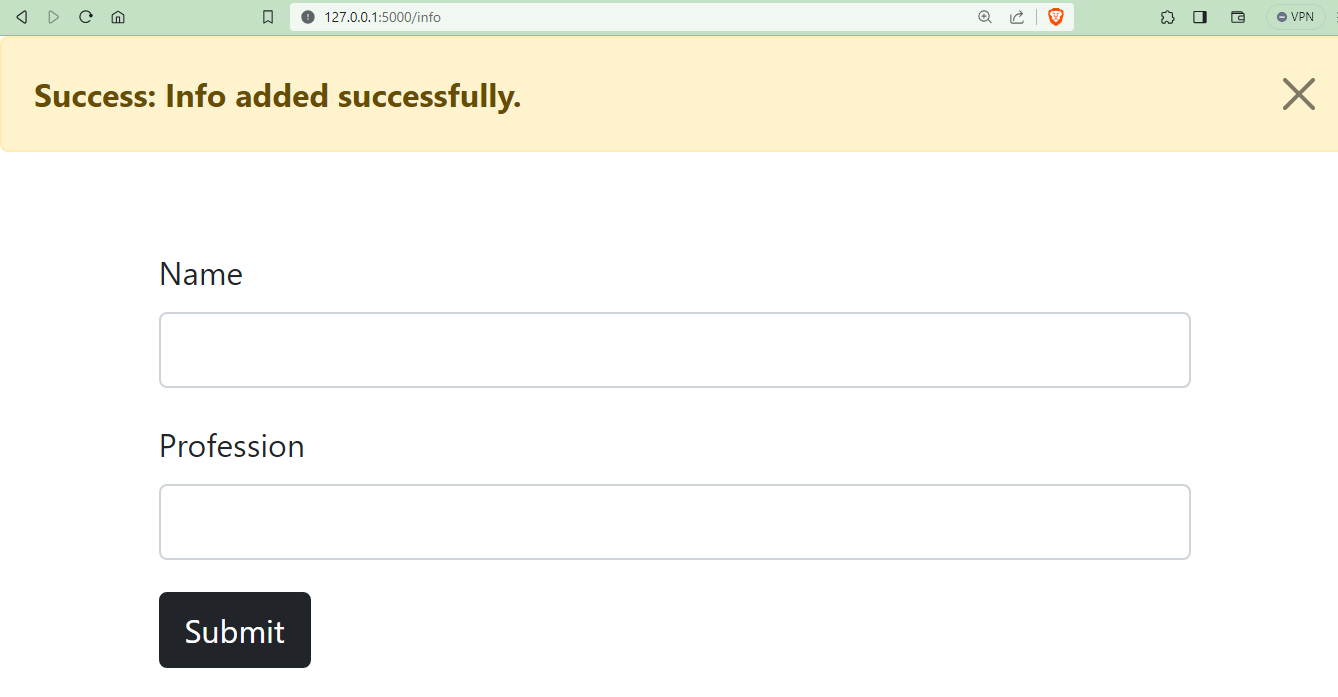
Here's a preview of the application hosted on the 127.0.0.1:5000 server using the "/info" route.
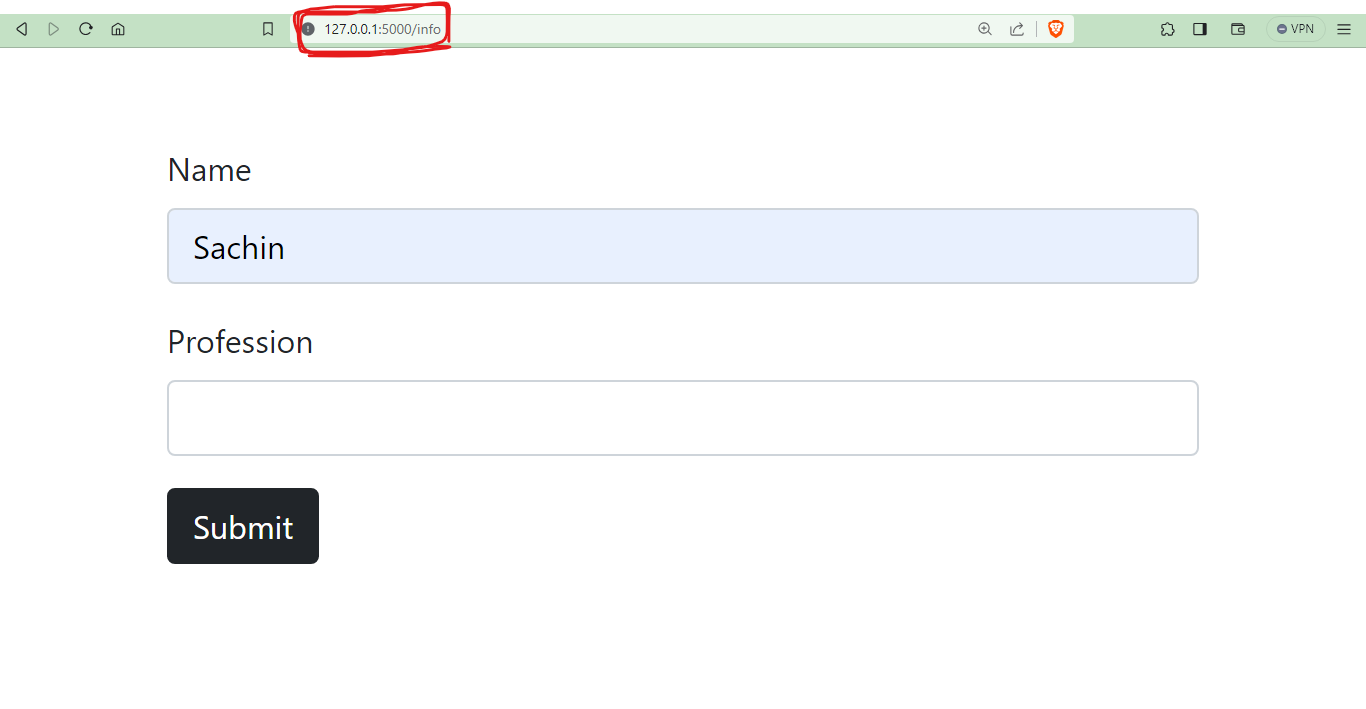
When submitting the form without completing the "Profession" field, the application displays the relevant flashed message.
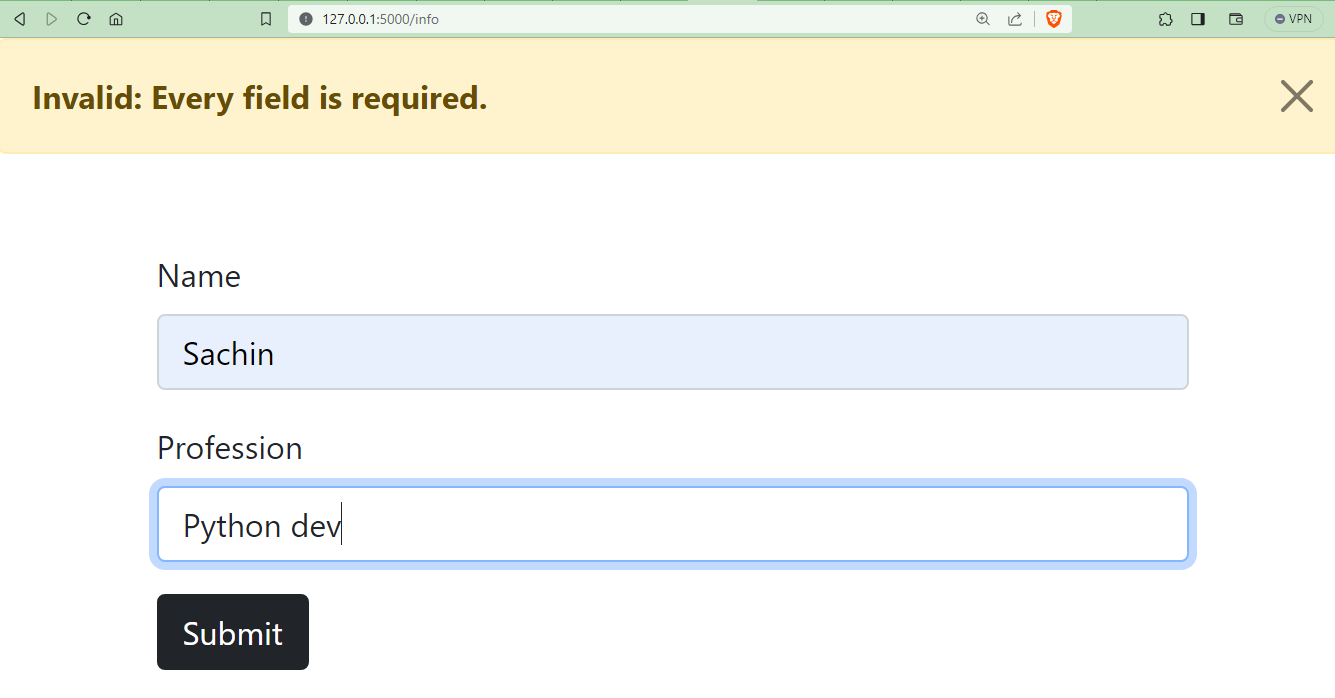
When the form is submitted with all fields completed, the relevant message is displayed.
Flashing Messages with Categories
Each message serves a unique purpose. Some aim to caution users, while others indicate successful task completion. Assigning categories to the messages makes them distinct from one another and provides a better user experience.
The get_flashed_messages() function offers a with_categories parameter that can be set to True. Doing so enables you to utilize the category assigned to the message in the flash() function.
Assigning Categories to the Messages
To assign categories, make use of the flash() function. Adjust your add_info() view function in the app.py file as demonstrated in the following code:
@app.route("/info", methods=["GET", "POST"])
def add_info():
    if request.method == "POST":
        name = request.form['name']
        profession = request.form['profession']

        if name == "" or profession == "":
            flash("Invalid: Every field is required.", "danger")
            return redirect(url_for("add_info"))
        else:
            flash("Success: Info added successfully.", "success")
            return redirect(url_for("add_info"))
    return render_template("info.html")
The categories danger and success are assigned to both messages. These categories correspond to Bootstrap CSS classes. Specifically, "danger" signifies errors, while "success" signifies successful completion.
Retrieving Categories and Applying Styles
To utilize categories from flashed messages in templates, retrieve them using get_flashed_messages(with_category=True) within the template. Then, iterate through them in a similar manner as you did with regular messages.
Adjust your message.html template by implementing the provided code as provided below:
{% with msg = get_flashed_messages(with_categories=True) %}
{% if msg %}
{% for category, message in msg %}
<div class="alert alert-{{ category }} alert-dismissible fade show" role="alert">
  <strong>{{ message }}</strong>
  <button type="button" class="btn-close" data-bs-dismiss="alert" aria-label="Close"></button>
</div>
{% endfor %}
{% endif %}
{% endwith %}
The categories are retrieved and utilized to apply specific CSS properties to the Bootstrap alert component, tailored to the respective request.
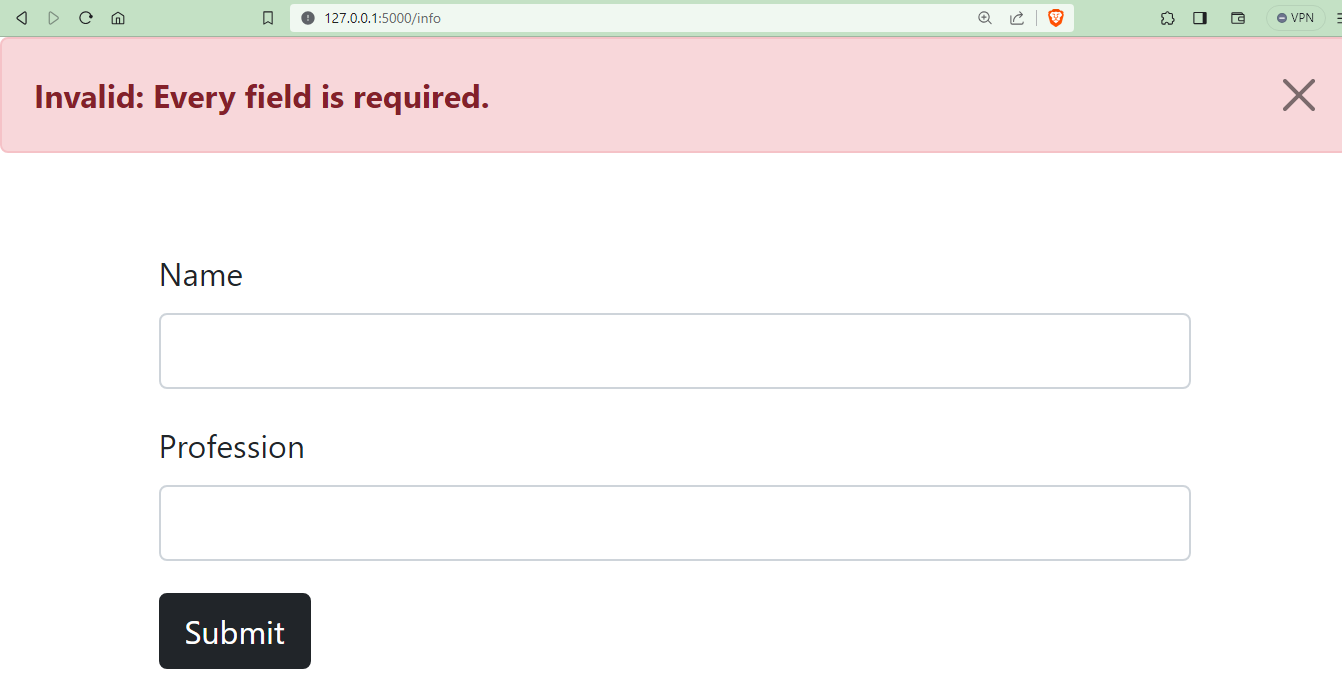
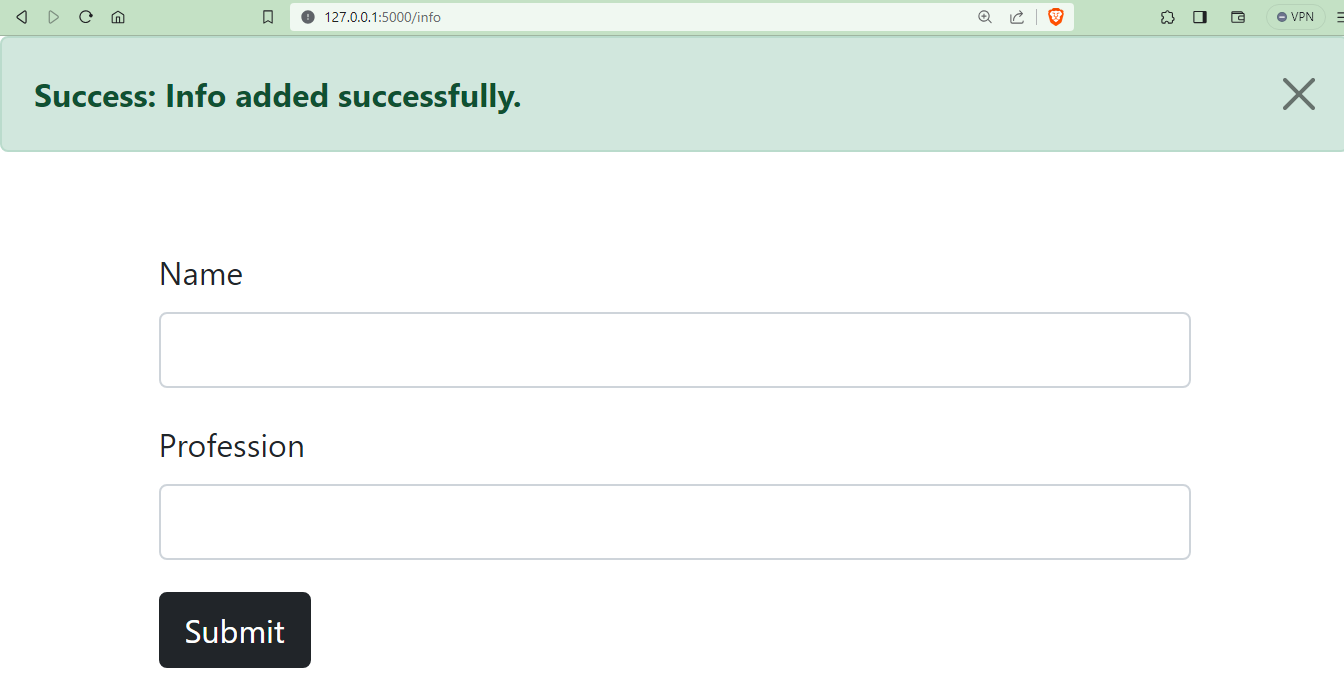
With these changes in place, run the application again. You'll observe messages being highlighted in varying colors that correspond to the specific request.
The illustration below depicts how the message's appearance differs between invalid and successful form submissions, respectively.
Another Use Case of Categories
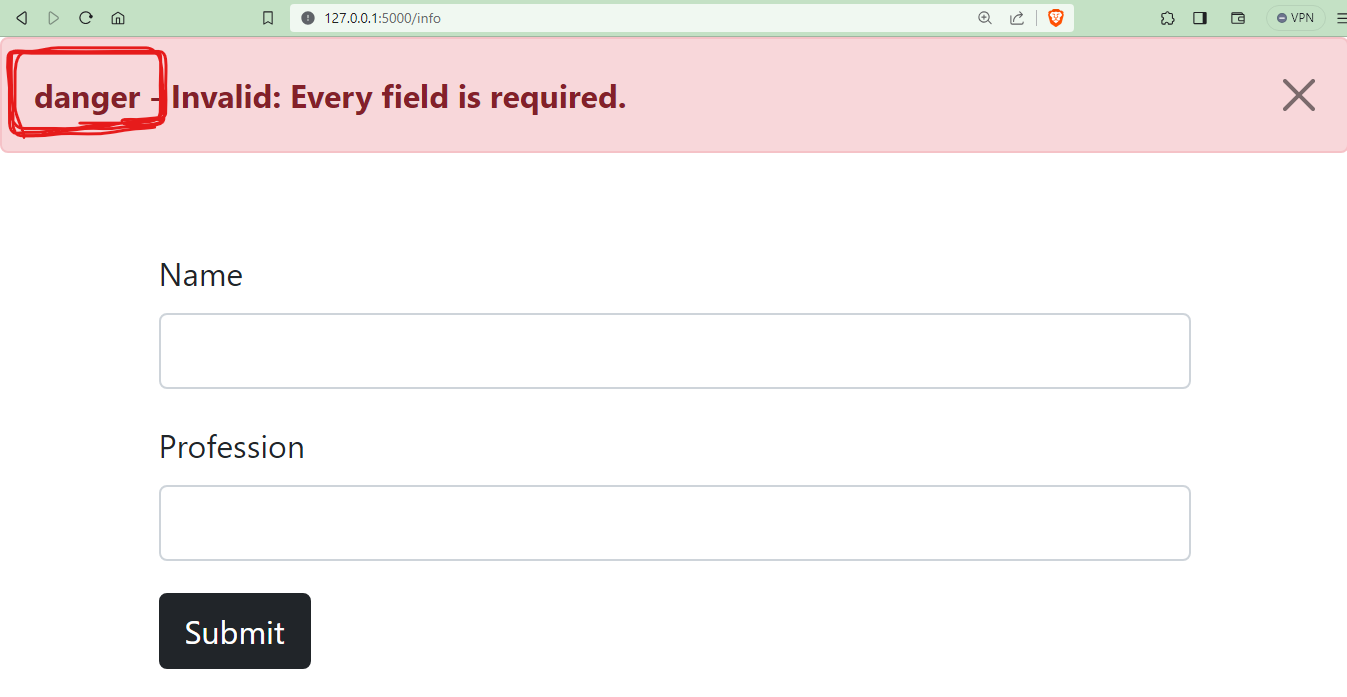
Categories could also serve as prefixes to messages, offering another practical application. Insert the provided attribute inside the <div> block of the Bootstrap alert component.
<strong>{{ category }} - {{ message }}</strong>
The provided code will add the corresponding category as a prefix to the actual message. This will result in an appearance similar to what's displayed in the image below.
Filtering Flash Messages Based on Categories
To filter messages based on categories, you can utilize the category_filter parameter within the get_flashed_messages() function in the template. This parameter accepts a list of message categories.
Create a new file named filtered_message.html within the templates folder. Then, insert the provided code snippet into this file.
{% with error_msg = get_flashed_messages(category_filter=["danger"]) %}
{% if error_msg %}
{% for message in error_msg %}
<div class="alert alert-danger alert-dismissible fade show" role="alert">
  <strong>{{ message }}</strong>
  <button type="button" class="btn-close" data-bs-dismiss="alert" aria-label="Close"></button>
</div>
{% endfor %}
{% endif %}
{% endwith %}
The code snippet mentioned above retrieves and filters messages based on the "danger" category using get_flashed_messages(category_filter=["danger"]). If there are flashed messages matching this category, the code iterates through them and displays them when the relevant request is made.
To display only messages with the "danger" category on the frontend, include the filtered_message.html template within info.html.
Best Practices for Using Flashed Messages in Flask
Flashed messages are highly valuable for enhancing the user experience through prompt feedback. To maximize their impact, it's important to implement the following practices.
Provide clear and concise messages, and avoid displaying messages on every request to prevent overwhelming users.
When presenting error messages, include instructions on how users can address the issue.
Assign suitable categories to messages that accurately reflect their content and purpose.
As flashed messages are temporary, consider adding a dismissal button to allow users to remove them once they are no longer needed.
Refrain from revealing any sensitive details in messages, as this could potentially compromise the security of your application.
Conclusion
Flashing messages on an application helps to notify users about some action performed, be it task completion, error, or warning. It enhances the user experience but only if it is used keeping in mind the best practices.
In this article, the secret key is hardcoded in the application, which is not a good practice. Store sensitive details like secret keys within the protected environment and refrain from revealing them in messages.
🏆Other articles you might be interested in if you liked this one
✅How to structure Flask app using Blueprint?
✅Upload and display images on the frontend using Flask in Python.
✅Building a Flask image recognition webapp using a deep learning model.
✅How to connect the SQLite database with Flask app using Python?
✅How to create a database in Appwrite using Python?
✅How to Integrate TailwindCSS with Flask?
That's all for now
Keep Coding✌✌