How to Create and Connect an SQLite Database with Flask App using Python

I am a self-taught Python developer who loves to write on Python Programming and quite obsessed with Machine Learning.
This article will guide you step by step in making a database using Flask-SQLAlchemy. It will show you how to work with an SQLite database in your Flask app, and then how to make a form on the website to collect user information and put it into the database.
Installing Flask-SQLAlchemy Lib
Flask-SQLAlchemy uses SQLAlchemy, a powerful ORM (object-relational mapping) library for Python, allowing interaction with databases using Python.
Open the terminal window and install the library using pip in your project environment.
pip install Flask-SQLAlchemy
Creating SQLAlchemy Instance
Create a database.py file and add the following code inside the file to create an instance of SQLAlchemy.
""" database.py file """
from flask_sqlalchemy import SQLAlchemy

""" SQLAlchemy Instance """
db = SQLAlchemy()
This instance will be used to create the database and manage database operations.
Creating Models
SQLAlchemy provides an object-oriented approach to creating database tables and columns, defining relationships, and setting constraints using Python classes.
Models let you define a database table with the fields you need in your database with constraints and relationships with other tables and fields by using only Python code.
""" models.py file"""

# SQLAlchemy Instance Is Imported
from database import db

# Declaring Model
class Vehicle(db.Model):
    __tablename__ = "vehicle"

    id = db.Column(db.Integer, primary_key=True)
    name = db.Column(db.String(150), unique=True, nullable=False)
    price = db.Column(db.Integer, nullable=False)
    created_at = db.Column(db.DateTime(timezone=True), server_default=db.func.current_timestamp())
Inside the models.py file, the SQLAlchemy instance (db) is imported to facilitate interactions with the SQLite database.
A class named Vehicle is declared, which inherits from db.Model, effectively making it an SQLAlchemy model. Inside this class, the table name and structure are specified with the following details and fields:
__tablename__: This attribute sets the table name in the database, which, in this case, is"vehicle".id: Theidcolumn serves as a primary key with an Integer data type, ensuring that each row has a unique id.name: Thenamecolumn, represented by aStringtype, will be used to store the vehicle's name with a maximum length of 150 characters. Theuniqueconstraint is enabled to enforce uniqueness, andnullable=Falseensures that the title must be provided for each entry.price: Thepricecolumn, ofStringtype, will be used to store the vehicle's price, and it cannot be left empty.created_at: This column, with aDatetimetype, captures the timestamp when an entry is created. The current timestamp will be automatically generated usingcurrent_timestamp()from thefuncmodule in SQLAlchemy.
Setup
Flask-SQLAlchemy can work with a variety of databases, but by default, if you don't specify a database URI in your Flask app configuration, it will use SQLite, a lightweight and simple database suitable for small-scale or demo projects.
from flask import Flask
from database import db

# Creating Flask App
app = Flask(__name__)
# Database Name
db_name = 'vehicle.db'

# Configuring SQLite Database URI
app.config['SQLALCHEMY_DATABASE_URI'] = 'sqlite:///' + db_name

# Suppresses warning while tracking modifications
app.config['SQLALCHEMY_TRACK_MODIFICATIONS'] = False

# Initialising SQLAlchemy with Flask App
db.init_app(app)
First, the code imports the Flask class from the flask module, enabling app creation, and the SQLAlchemy instance from database, facilitating database management.
The Flask app instance is created using Flask(__name__), and the instance is stored in the variable app. The use of __name__ is to determine the root path of the module.
The database name, vehicle.db, is defined and stored in the variable db_name. The SQLALCHEMY_DATABASE_URI config variable is then set, which contains the SQLite database connection string 'sqlite:///' + db_name.
For other database engines, the connection URL formats differ. For example, for MySQL and PostgreSQL, the URL formats are provided as follows.
mysql://
username:password@host:port/database_namepostgresql://
username:password@host:port/database_name
The SQLALCHEMY_TRACK_MODIFICATIONS config variable is set to False, disabling modification tracking of objects and suppressing warnings.
Finally, an instance of SQLAlchemy is initialized and binds with the Flask app by calling db.init_app(app).
Creating Database
There are two approaches, you can perform either one to create the database and a table with the defined fields.
Approach 1 - Manually Pushing the App Context
""" app.py file """
# Previous Code Here

""" Creating Database with App Context"""
def create_db():
    with app.app_context():
        db.create_all()

if __name__ == "__main__":
    from models import Vehicle
    create_db()
The code defines a function named create_db(), which utilizes the app_context() of the Flask app instance (app) with a with statement.
In the app context, the create_all() method of the db object, provided by SQLAlchemy, is invoked to create all the tables specified in the models module.
In the if __name__ == "__main__" block, the Vehicle model is imported and create_db() function is called to generate the table.
To execute the app, either run it from your Integrated Development Environment (IDE) or use the terminal by entering the following command.
python app.py
Successful execution will result in the creation of a "vehicle.db" database within the instance directory at the root level.
Approach 2 - Flask Shell
When using the Flask shell, the commands are executed within the context of the Flask app. Below are the CLI commands to run in your terminal.
D:\SACHIN\Pycharm\FlaskxDB>flask shell
Python 3.10.5 (tags/v3.10.5:f377153, Jun  6 2022, 16:14:13) [MSC v.1929 64 bit (AMD64)] on win32
App: app
Instance: D:\SACHIN\Pycharm\FlaskxDB\instance
>>> from database import db
>>> from models import Vehicle
>>> db.create_all()
>>> exit()
The SQLAlchemy instance, db and the model, Vehicle are imported from the database and models module respectively. Then, the db.create_all() command is executed to create a table based on the defined model. Finally, you can exit the shell using the exit() command.
The database vehicle.db would be created in the instance directory at the project's root directory.
Creating Frontend
To create a frontend and collect data from users via form, the following HTML files inside the templates folder need to be created.
root_dir(project)
|_templates/
|    |_base.html
|    |_home.html
|    |_vehicle.html
|
|_app.py
|_database.py
|_models.py
The layout and Bootstrap CSS and JS will be stored in base.html, the vehicle data from the database will be displayed in home.html, and a form for adding vehicle data will be stored in vehicle.html.
base.html
<!DOCTYPE html>
<html lang="en">
<head>
    <meta charset="UTF-8">
    <title>Vehicle</title>
    <link href="https://cdn.jsdelivr.net/npm/bootstrap@5.1.3/dist/css/bootstrap.min.css" rel="stylesheet" integrity="sha384-1BmE4kWBq78iYhFldvKuhfTAU6auU8tT94WrHftjDbrCEXSU1oBoqyl2QvZ6jIW3" crossorigin="anonymous">
</head>
<body>

{% block body %} {% endblock %}

<script src="https://cdn.jsdelivr.net/npm/bootstrap@5.1.3/dist/js/bootstrap.bundle.min.js" integrity="sha384-ka7Sk0Gln4gmtz2MlQnikT1wXgYsOg+OMhuP+IlRH9sENBO0LRn5q+8nbTov4+1p" crossorigin="anonymous"></script>
</body>
</html>
home.html
{% extends "base.html" %}
{% block body %}
<h1 class="text-center my-5">🚗Vehicles🚗</h1>
<div class="container d-flex justify-content-center align-items-center">
    <a class="btn btn-outline-info mb-3" href="{{ url_for('add_vehicle') }}">Add Vehicles</a>
</div>
<div class="container">
    <table class="table table-dark table-striped">
        <thead>
        <tr>
            <th scope="col">ID</th>
            <th scope="col">Vehicle</th>
            <th scope="col">Price(INR)</th>
            <th scope="col">Created on</th>
        </tr>
        </thead>
        {% if not details%}
        <div class="text-center">
            <h3 class="my-5">No Records to Display!</h3>
        </div>
        {% else %}
        <tbody>
        {% for data in details %}
        <tr>
            <th scope="row">{{data.id}}</th>
            <td>{{data.name}}</td>
            <td>₹{{data.price}}</td>
            <td>{{data.created_at}}</td>
        </tr>
        {% endfor %}
        </tbody>
        {% endif %}
    </table>
</div>
{% endblock %}
vehicle.html
{% extends "base.html" %}
{% block body %}
<h1 class="text-center my-5">🚗Vehicle Details🚗</h1>
<div class="container">
    <a class="btn mb-3 btn-outline-info" href="{{ url_for('home') }}">Go to Home</a>
    <form action="/add-vehicle" method="POST">
        <div class="mb-3">
            <label class="form-label" for="vehicle">Vehicle</label>
            <input class="form-control" id="vehicle" name="vehicle" placeholder="Vehicle name with model and brand"
                   required type="text">
        </div>
        <div class="mb-3">
            <label class="form-label" for="price">Price</label>
            <input class="form-control" id="price" name="price" placeholder="Price of the vehicle in INR"
                   required type="text">
        </div>
        <button class="btn mt-3 btn-outline-success" type="submit">Add Vehicle</button>
    </form>
</div>

{% endblock%}
Creating Routes and Logic
""" app.py file """
# Previous Code Here

""" Creating Routes """
@app.route("/")
def home():
    details = Vehicle.query.all()
    return render_template("home.html", details=details)

@app.route("/add-vehicle", methods=['GET', 'POST'])
def add_vehicle():
    if request.method == 'POST':
        v_name = request.form.get('vehicle')
        price = request.form.get('price')

        add_detail = Vehicle(
            name=v_name,
            price=price
        )
        db.session.add(add_detail)
        db.session.commit()
        return redirect(url_for('home'))

    return render_template("vehicle.html")

if __name__ == "__main__":
    from models import Vehicle
    create_db()
    app.run(debug=True) # This line of code is added in this section
First of all, add the necessary imports in the app.py file: render_template, request, redirect, and url_for.
The provided code establishes two distinct routes: the home or "/" route and the /add-vehicle route.
The main page route (@app.route("/")) uses a function called home(). This function retrieves all vehicle information from the database using the Vehicle model and shows it on the home.html page.
The /add-vehicle route can handle both GET and POST requests. The add_vehicle() function is responsible for displaying the vehicle.html page. It also handles the process of taking user data from a submitted form, adding it to the database using db.session.add(), confirming the changes with db.session.commit(), and sending the user back to the main page through redirect(url_for('home')).
Testing
Run the Flask app directly from the IDE or as a Python module to see the app hosted on http://127.0.0.1:5000, or manually enter http://localhost:5000 in the browser's address bar.
The following image shows the first glimpse of the homepage.
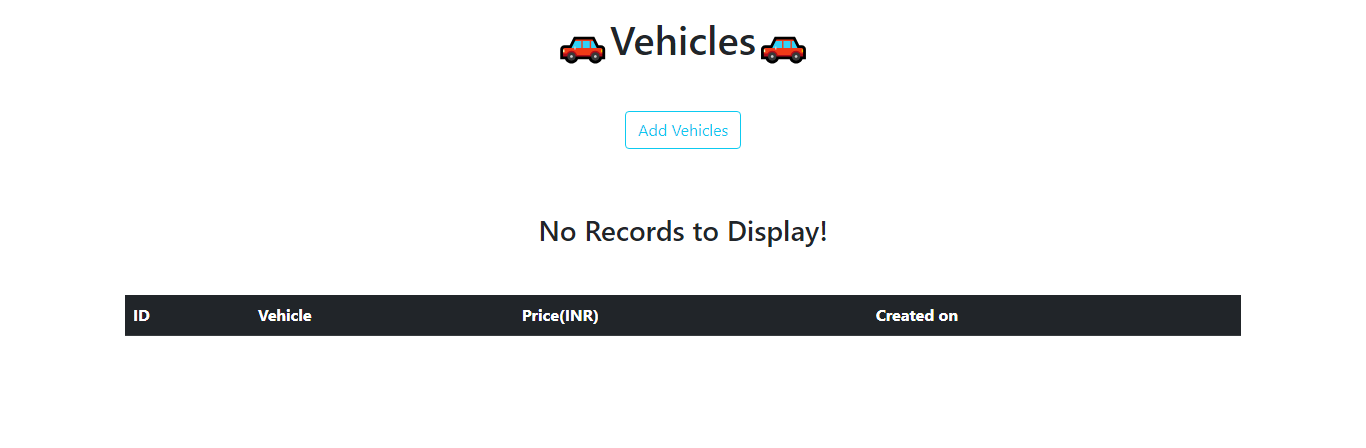
To add vehicle information, use the "Add Vehicles" button or the /add-vehicle route.
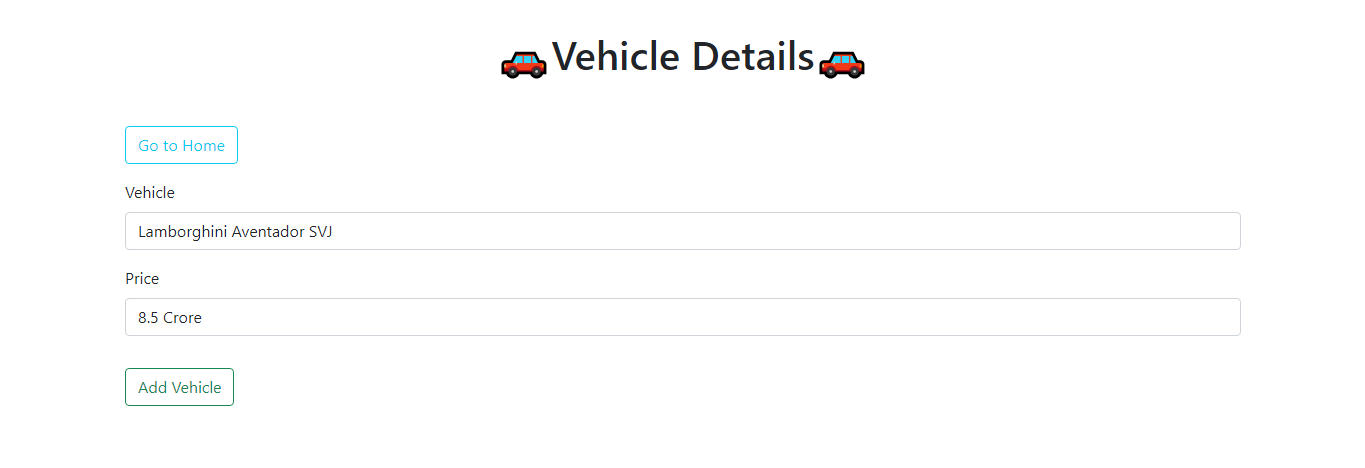
After you submit the form, the vehicle information will be displayed on the homepage, to which you will be automatically redirected.

Source Code
Access the full source code written in this article from the following GitHub repository and clone or download it and run the application to try it out.
Conclusion
SQLAlchemy is used to create an SQLite database and integrated with the Flask app to interact with the database. A simple application was created in which a form is integrated to get the data from the user and add it to the database and then display it on the homepage of the application.
This article has walked you through the steps in making the SQLite database using Flask-SQLAlchemy and integrating it with the Flask app.
🏆Other articles you might be interested in if you liked this one
✅How to connect the PostgreSQL database with Python?
✅How to create a database in Appwrite using Python?
✅Upload and display images on the frontend using Flask in Python.
✅Building a Flask image recognition webapp using a deep learning model.
✅How to Integrate TailwindCSS with Flask?
✅What are Public, Protected, and Private access modifiers in Python?
That's all for now
Keep Coding✌✌